TEXTURE TUTORIAL
Create new Docoment
with white background.
Choose the
text tool and a simple font. I used Arial.The font size doesn't matter.
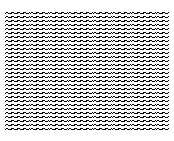
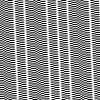
Write one line using symblos like dots, spacers, etc. I used this: ~
![]()
Copy the line, move into the next row, and paste. Repeat this as often as you want.

Now choose >Window> Character. A text palette will pop up.
Now you have to
work on the line and character spacing. and maybe on the letter size.
Change it to you liking. Also change the font if you want.
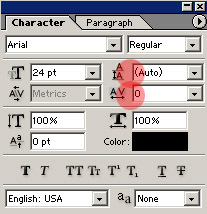
I changed the font to Arial Narrow Special G, line spacing 4 pt, character spacing -150. Font size 18.
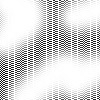
Create icons from, background white, 100x100, RGB.
Drag the text layer into the icon.

Duplicate Text layer and us move too to reach more density (just use the arrows and move it maybe two pixel).
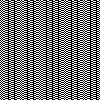
You could of course duplicate it more than once.
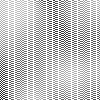
This could be done now, however you have more options. You could flatten the image by going to Layer> Flatten Image.
And then Invert the image: Image>Adjustments>Invert
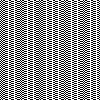
Or you could Transform it. For instance, move to Edit>Free Transform and put in 45°. Remember to link the layers before that.You can of course, tranform it differently as well.
As a last step
you could use a gradient on top, or a simple circle brush.
Create new layer and add some white with the brush.
Set the opacity down to 70% and use the Motion Blur.
Done!!!!