 COMPLETE LEX ICON
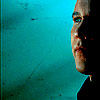
First of all, I opened the image I wanted to use in this icon.
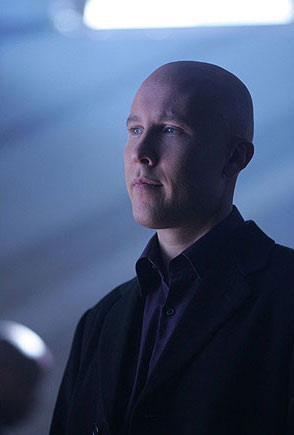
I usually change the color beforehand so I can see more details. I used Layer> New Adjustment Layer> Selective Color...
The pop up which appears once you clicked the above, looks like this.
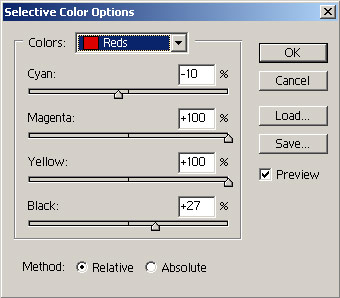
The field "colors" has 9 different color options in the drop down menu. Each color can be changed by using the controlers below that.
For the icon in question, the color specifications for changed as follows.
| Red Cyan= -10 Magenta= +100 Yellow= +100 Black= +27 |
Cyans Cyan= +100 Magenta= -100 Yellow= +31 Black= +34 |
Whites Cyan= 0 Magenta= 0 Yellow= 0 Black= -91 |
| Yellows Cyan= +1 Magenta= -3 Yellow= 0 Black= +21 |
Blues Cyan= +100 Magenta= -46 Yellow= -65 Black= +19 |
Neutrals Cyan= 0 Magenta= 0 Yellow= 0 Black= 0 |
| Greens Cyan= 0 Magenta= 0 Yellow= 0 Black= 0 |
Magentas Cyan= -100 Magenta= -41 Yellow= +100 Black= +54 |
Blacks Cyan= 0 Magenta= 0 Yellow= 0 Black= +12 |
or detailed information about Adjustment Layers and how to use them, check this tutorial I wrote a while back.
Result

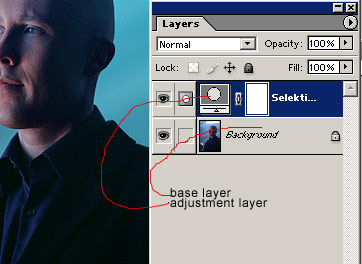
Create a new file. Click File> New and in the pop choose width and height=100 pixels and Resolution 72 pixel/inch. You now have 2 files open, the icon sized document as well as the Lex image consisting of 2 layers, the base image and the adjusment layer. Choose the Lex image and lock the base layer and the adjusment layer together.
unlocked:
locked (Just click on the colored field and the chains appear):
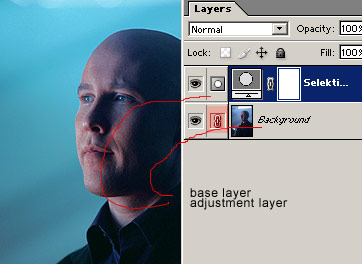
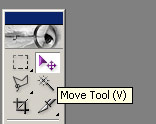
Now you can drag and drop those layers into the icon document together. Just use the Move Tool (V), click on the adjustment layer and move the mouse cursor over the icon tool. Keep the mouse pressed until you are in the icon document.
Close the base lex image. You can decide wether you want to keep the changes or not. Work in the icon document now only.

The image is still there in it's original size and as long as you don't Crop anything, the whole image will remain as long as saved as psd file.
Now you have to resize the LEX layer using Free Transform. Take some time to decide how large it should be and where you want to position your image in the icon. Don't make the image to small, the quality will lessen if you make it bigger afterwards. Better duplicate the layer.


Once you have chosen. Sharpen the image by using Filter> Sharpen> Sharpen

After that drag and drop the texture into the icon as new layer. Put it on top the lex image and the adjustment layer.

Then blend the texture with the layers below. Choose blend-mode Color burn.

After this, add a new adjustment layer. This time use the Color Balance ( Layer> Adjustment Layers> Color Balance...)
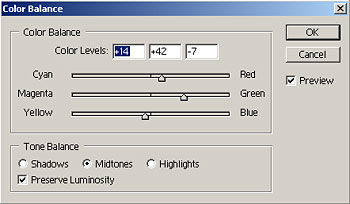
This will change the color a bit yet again.

Then, create another Adjustment layer, this time Brightness/Contrast.
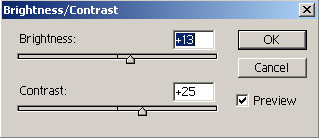
The icon will be less dark.

Also, now that the base of the icon is done, the decoration can be added.
Create a new layer and add a little black bar using the Rectangular Marquee Tool and filling the selection with the color black.
Last but not least, add several tex layers using Arial, 3pt, sharp and create several lines.Movies those lines together a bit so they overlap and maybe rotate them 1°. That will make it a bit more dynamic.
The text can be something totally meaningless. Or somethign that fits the topic. It is too tiny to read.
And voila, icon is done: